Before creating a Delivery, you should have added your vehicles and applied your Delivery Settings. See the How to Set-up Delivery Settings article on how to do this.
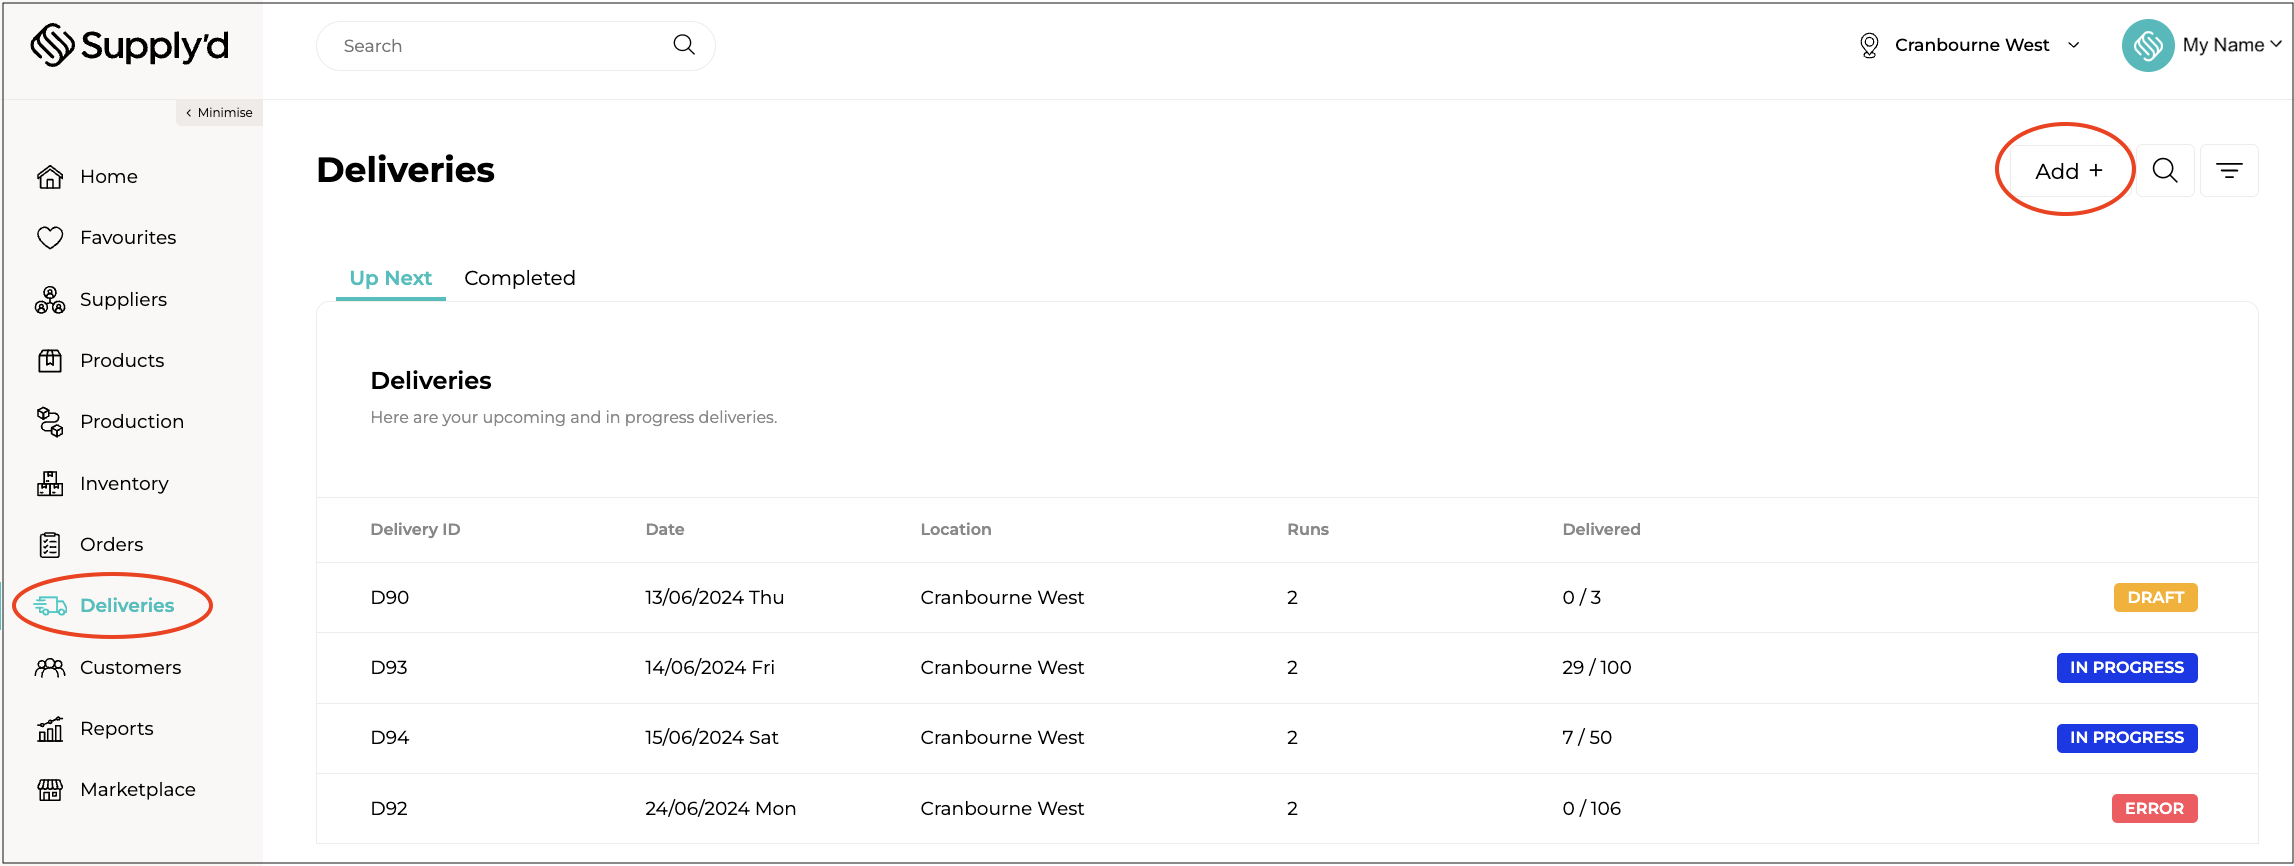
Selecting "Deliveries" from the main menu will open the the "Deliveries" page, listing any deliveries you have created. This is also where you can create new Delivery.
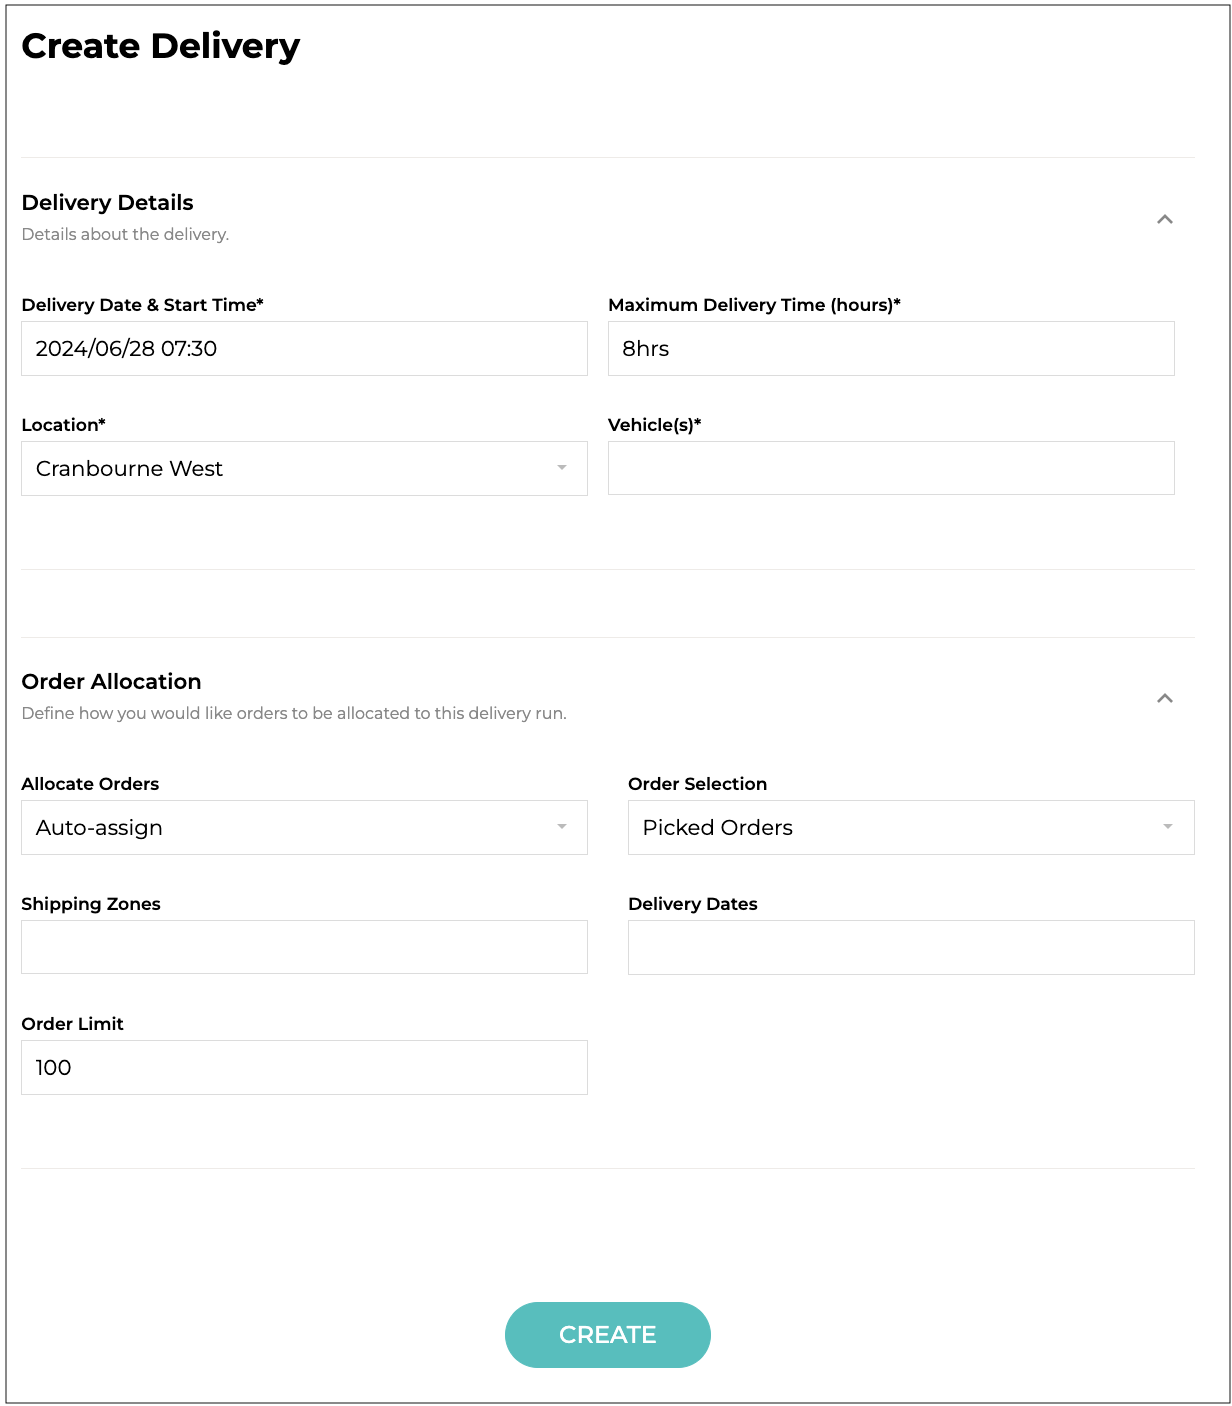
To create a delivery, click on "Add +" in the top right-hand corner. The "Create Delivery" form will open. Complete the fields as per the steps below.
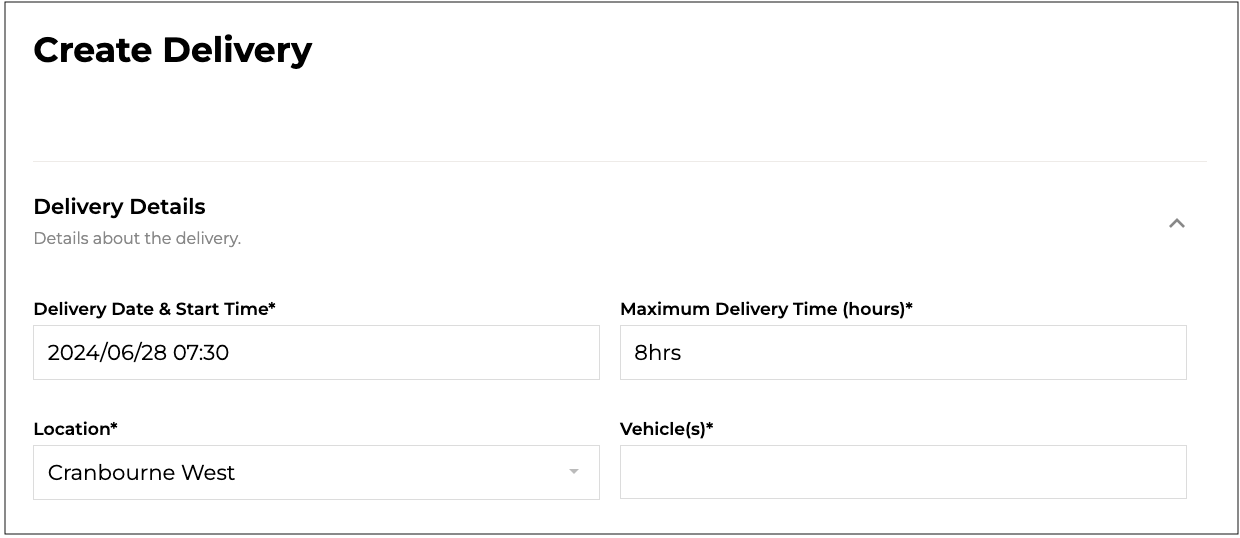
Delivery Details
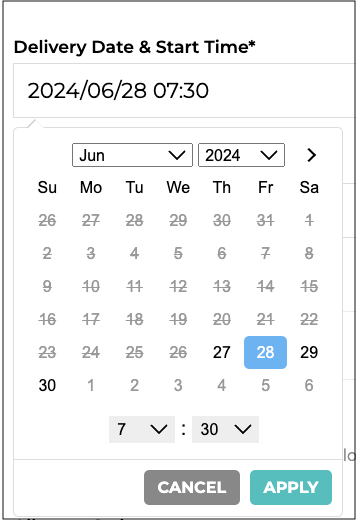
- Delivery Date & Start Time* [required] - The start date and time for the delivery. Select from the calendar and clock that will show when you click on the field.
- Maximum Delivery Time (Hours)* [required] - The maximum delivery time for each delivery run.
- Location* [required] - The location this vehicle is used at. Select from your list of Locations.
- Vehicle* [required] - Select one or more vehicles for this delivery.
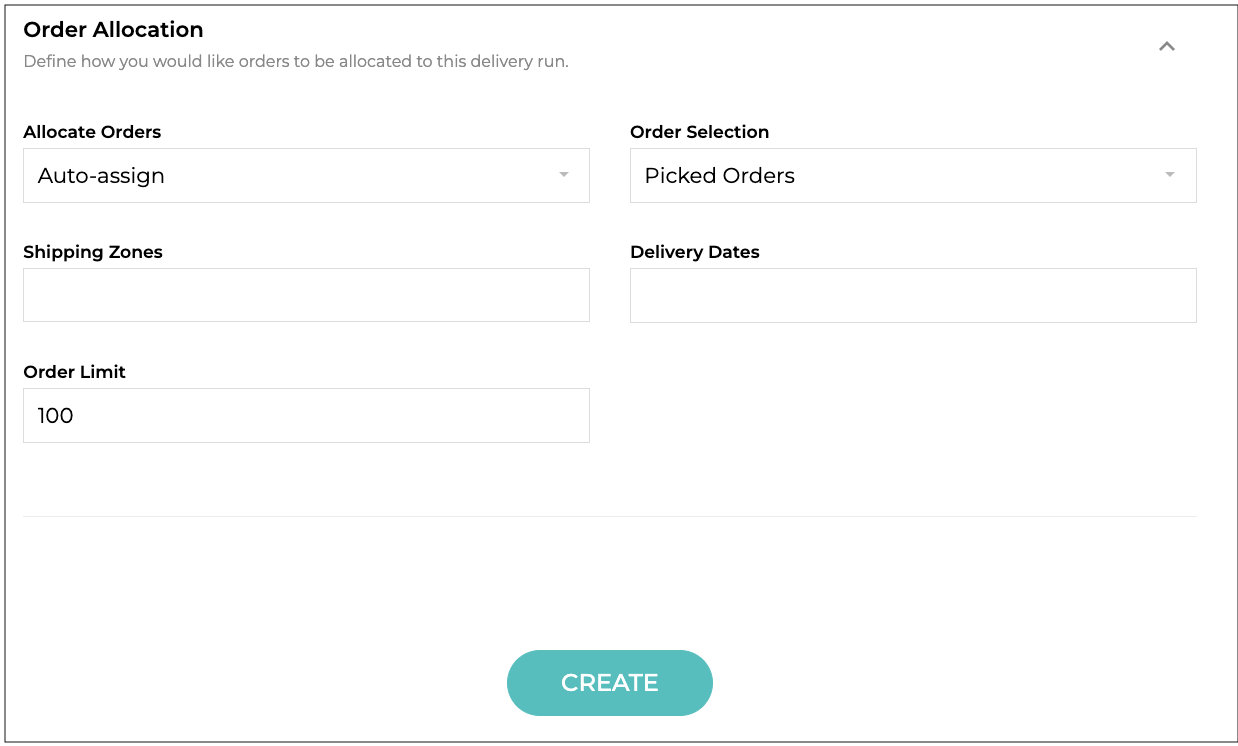
Order Allocation
- Allocate Orders - How you would like to allocate orders to this delivery run.
- Auto-assign: Have orders automatically assigned based your chosen criteria.
- Manually: Manually assign order to the delivery run after it has been created.
- Order Selection - How would you like to allocate orders to this delivery run.
- All Picked Orders: Assign all orders that have been picked but not yet delivered.
- Filtered Selection: Add orders based on set criteria such as specific shipping zones and/or delivery date.
- All Unfulfilled: Assign all orders that have not yet fulfilled.
- Shipping Zones - Add orders allocated to the attached Shipping Zones to the delivery run. Leave blank for all shipping zones.
- Delivery Dates - The default time this vehicle is normally stopped at a destination. Select from the calendar that will show when you click on the field. Leave blank to use the default stoppage time set in you Delivery Settings. Leave blank for all delivery dates.
- Order Limit - A limit to the amount of orders that will automatically allocated to the delivery. Maximum 2,000 deliveries.
Click "CREATE" to finish creating the Delivery Run.
Assigning Orders to a Delivery
Supply'd can auto-assign deliveries based on certain Shipping Zones, Order Status, Delivery Dates etc. You can also manually assign orders. You can select whether to Auto-Assign or Manually assign orders when creating a delivery run as explained above.
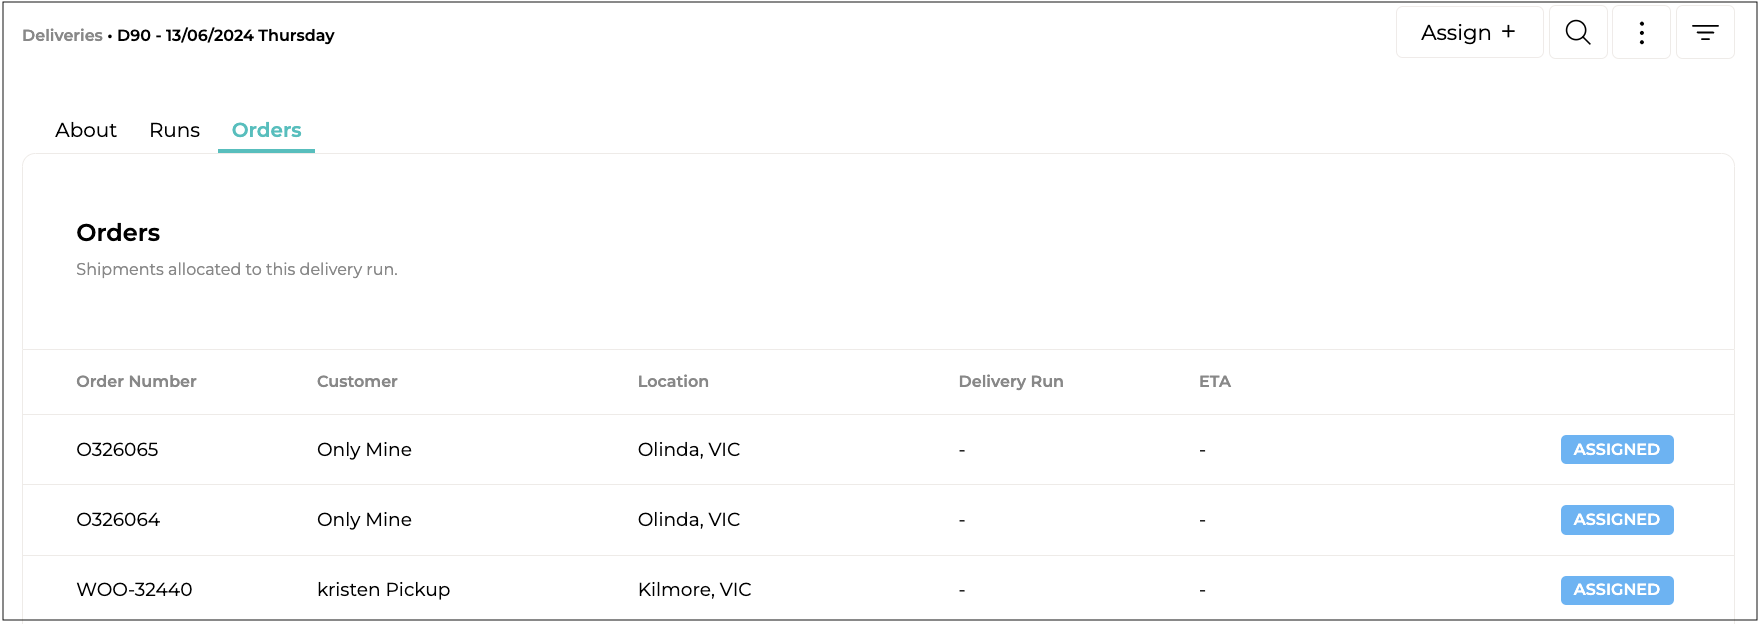
To assign orders to a delivery run, select the delivery you would like to assign the orders to. Go to the "Orders" tab. Click on "Assign +" in the top right-hand corner. This will bring up a list of current orders. To assign orders to this delivery, tick the box beside the orders you would like to add.
Click "SAVE" to assign the orders.
The orders will now appear on the "Orders" list.
Assigning a Driver
Once the delivery is set up an orders assigned, you can optionally assign a driver to that delivery.
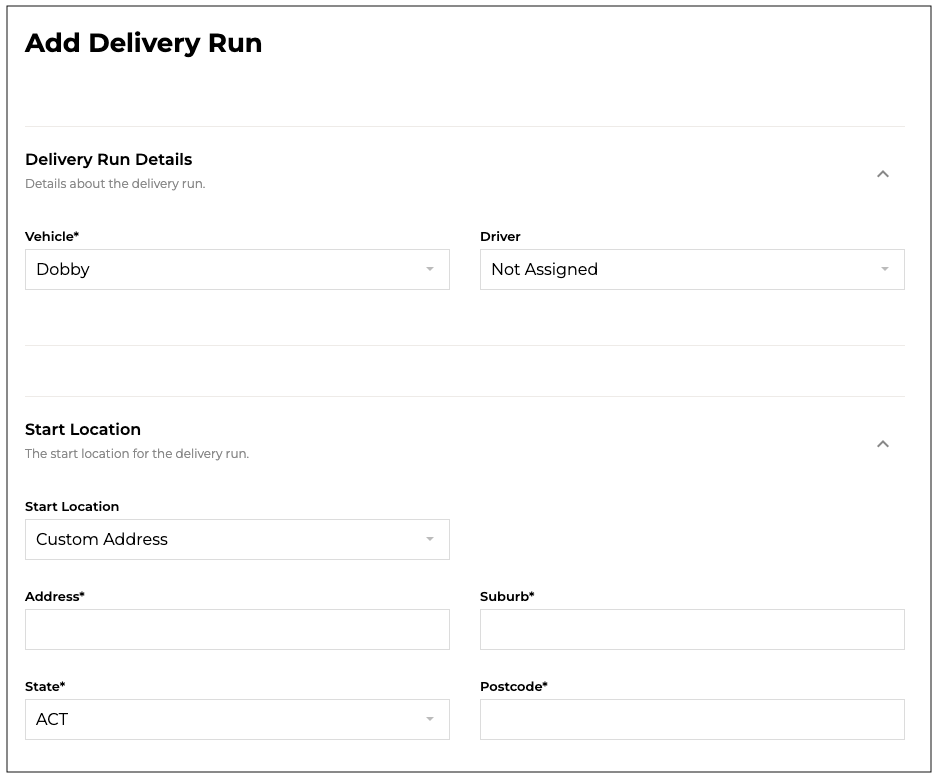
To assign a driver to a delivery run, select the delivery run you would like to assign the driver to. Go to the "Run" tab. Click "Add +" in the top right-hand corner. The "Add Delivery Run" form will open.
Select the driver from the drop-down.
If the driver doesn't exist in Supply'd, you will need to add them as a User. The How to Add & Manage Users article explains how to do this. Select "Delivery Driver" as the Account Type. This user type will gain access to to Delivery Runs they are assigned to.
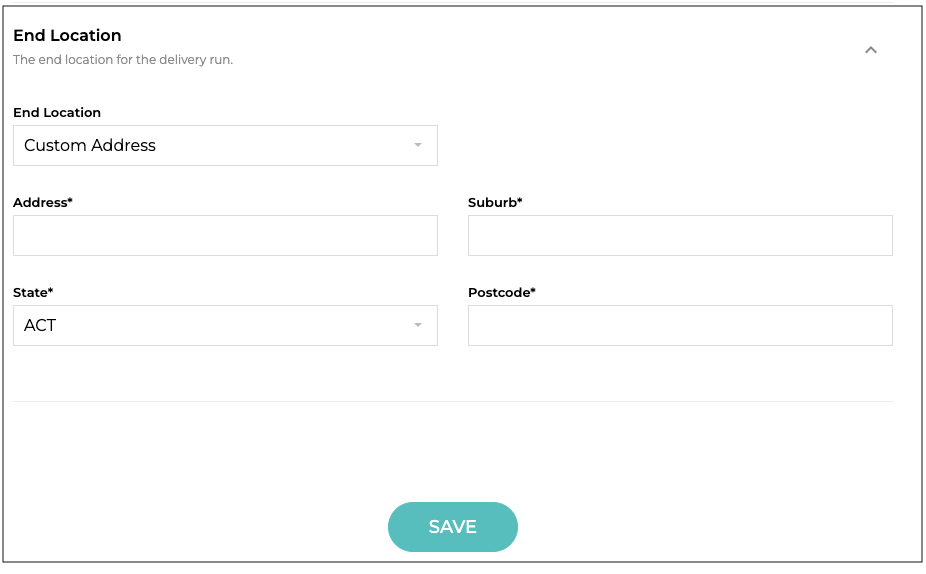
If the Start Location and/or End Location is different to your current location (such as a driver wanting to end their run a their house), you can add a Custom Address for this.
Click "SAVE".
Managing Deliveries
The "Deliveries" page lists all the deliveries you have set up. The "Up Next" tab lists all the upcoming deliveries and the "Completed" tab lists those deliveries that have been completed.
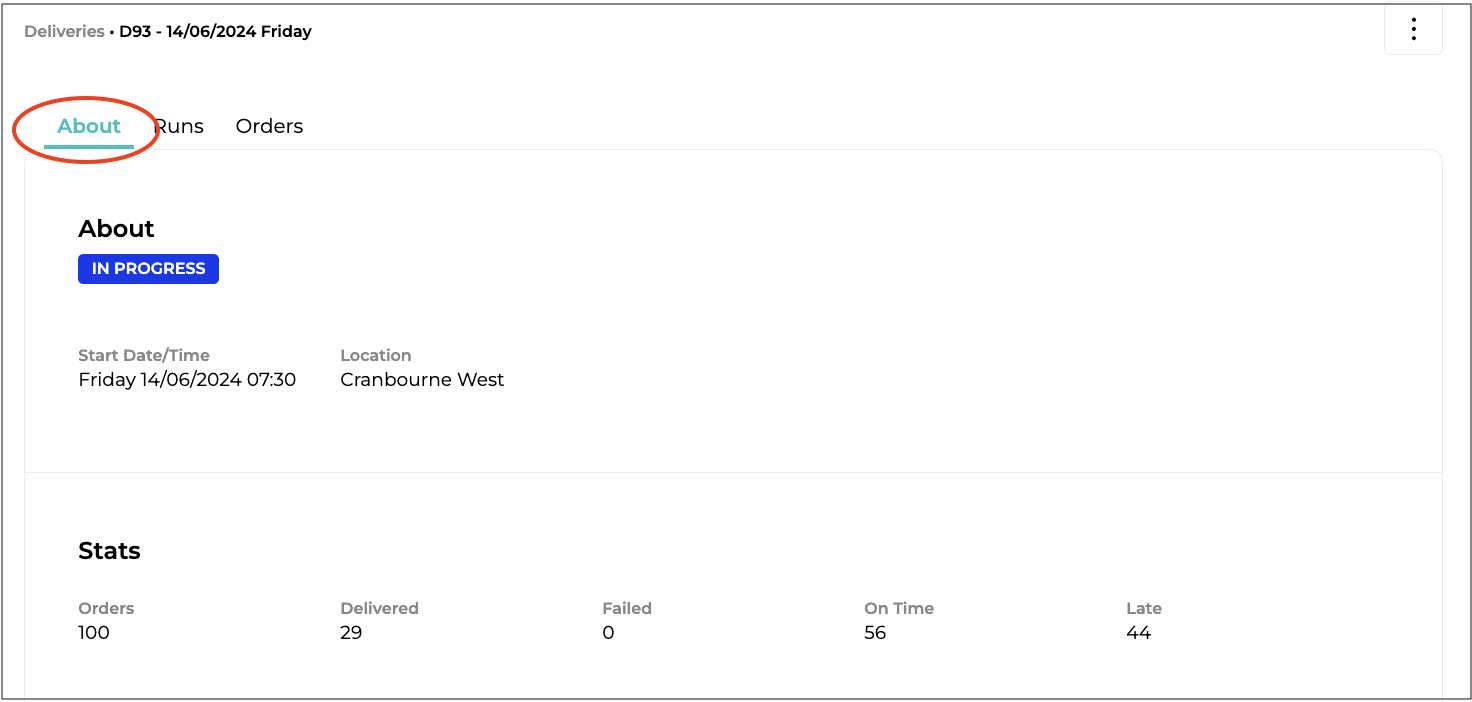
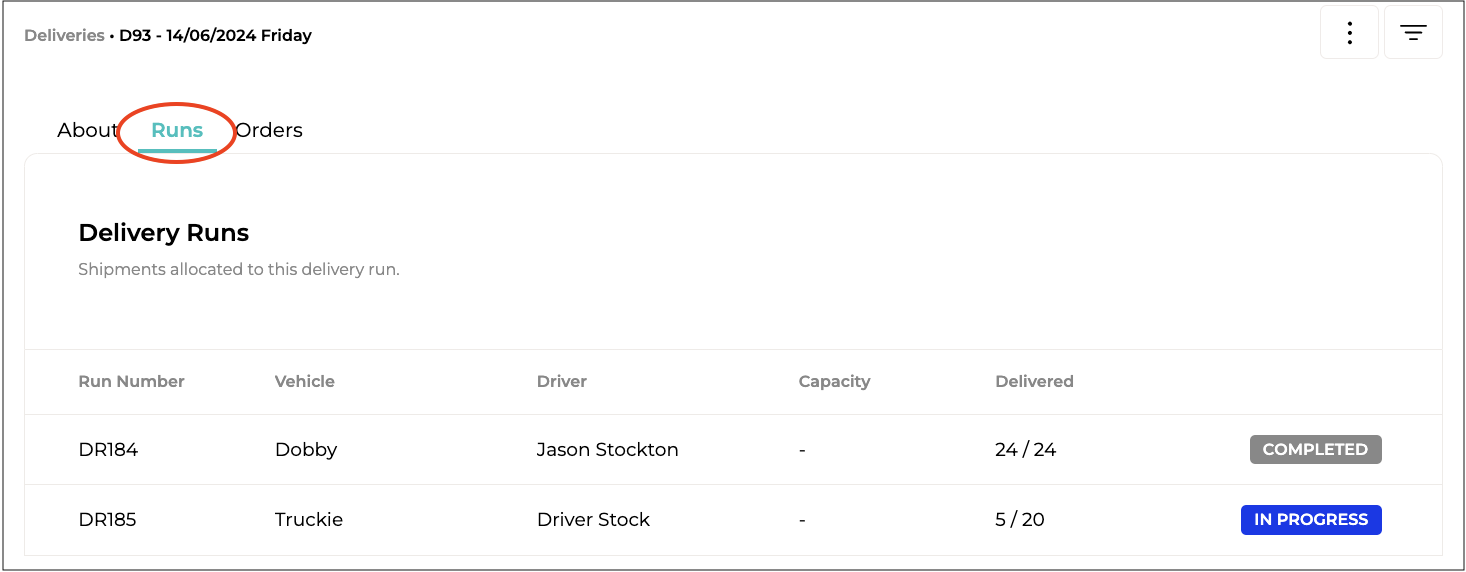
Clicking on a delivery brings up all the details about that delivery. You will see 3 tabs - "About", "Runs" and "Orders".
About
The "About" tab shows all the statistics on the delivery run - the number of Orders, how many have been Delivered, how many have Failed to be delivered, how many were delivered On Time, and how many were delivered Late.
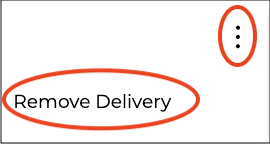
Clicking on the 3 dots in the top right-hand corner will bring up a menu with the following options:
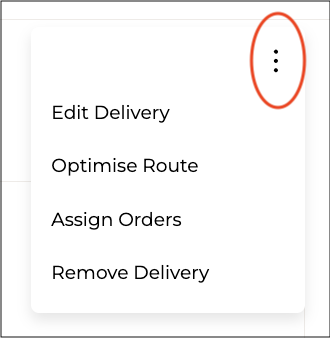
or this depending if the delivery has started or is being optimised.
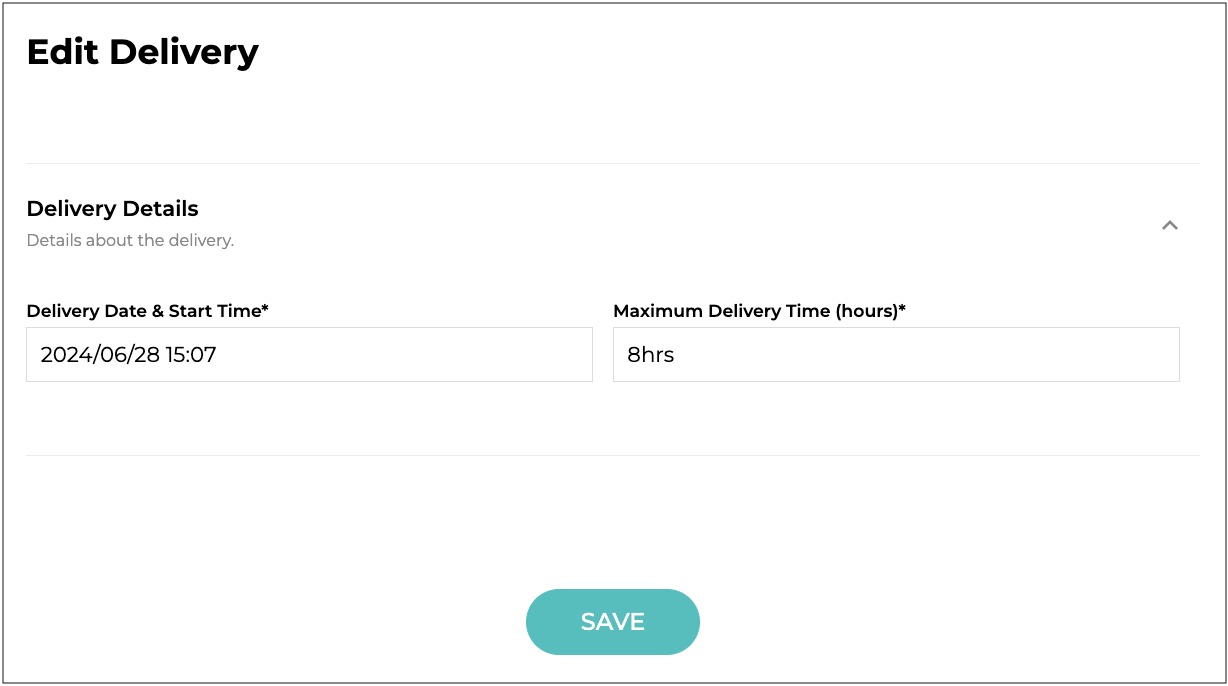
- Edit Delivery
Allows you to change the Delivery Date & Start Time and the Maximum Delivery Time (Hour). - Optimise Route
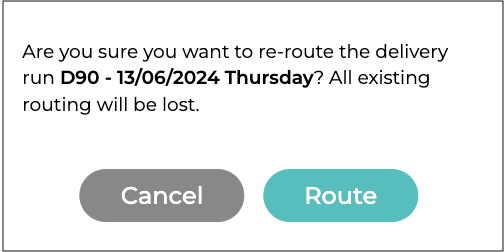
Optimise the delivery route for all the allocated orders across the available runs.
- Assign Orders
Allows to assign orders to a delivery. Clicking "Assign Orders" will bring up a list of current orders. Assign the orders as per the instructions above. - Remove Delivery - Allows you to remove a delivery. You will be asked to confirm.
Runs
The "Runs" tab shows the Run Number, the Vehicle used, the Driver, the Capacity of the vehicle and the date Delivered. It will also show the status of the order using colour coding for easy identification. This is also where you can assign a driver, as explained above.
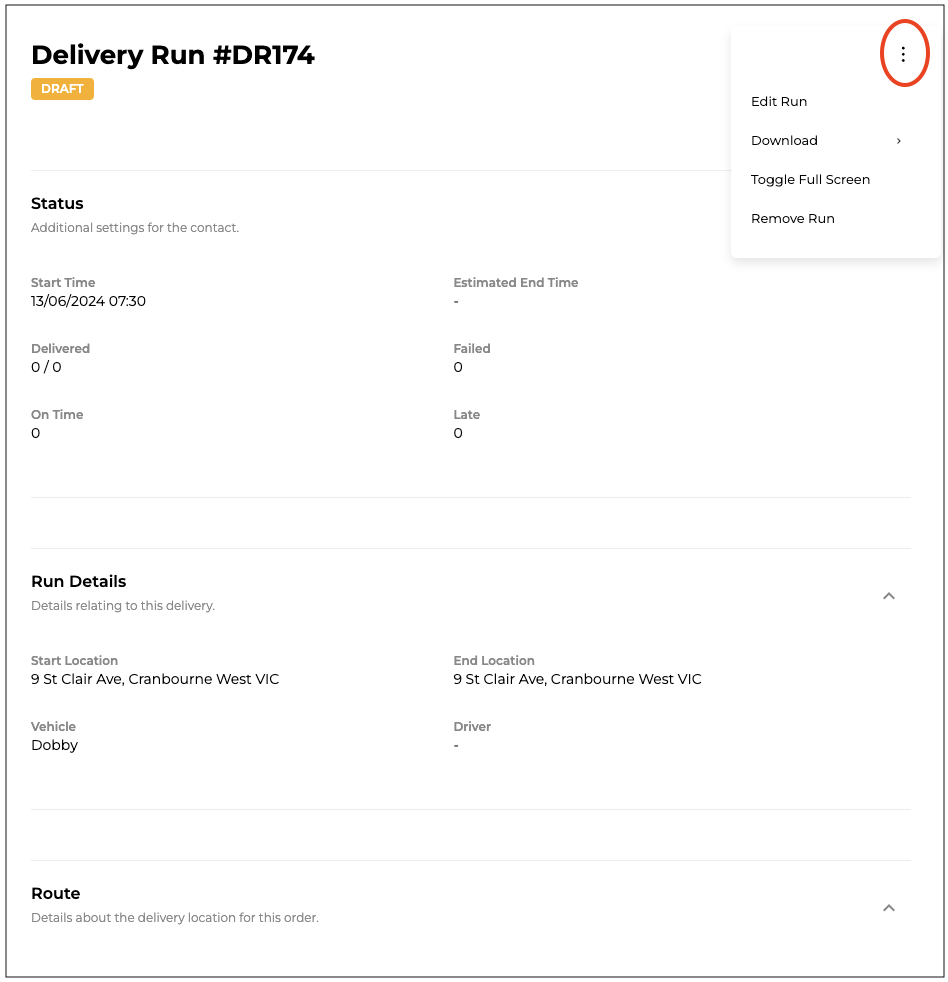
Clicking on a run will bring up all the details on that run. Clicking on the 3 dots in the top right-hand corner will bring up a menu with the following options:
- Edit Run - This will bring up the "Edit Delivery Run" form (the same as the Add Delivery Run form) where you can edit the Vehicle, Driver,Start and End Locations.
- Download - This will allow you to download the "Delivery Run List".
- Toggle Full Screen - Brings up a full-screen version of the delivery run details.
- Remove Run - Will remove the delivery run. You will be asked to confirm.
Orders
The "Orders" tab shows all the orders in the delivery run - the Order Number, Customer, Location (suburb & state), the Delivery Run number, and the estimated date and time (ETA) it will be (or was) delivered. You can also manually add orders to a delivery, as explained above.

