There are 2 ways to add customers to Supply'd.
- Manually add customers to Supply'd (see the How to Add Customers and Customer Groups article for instructions on how to do this.)
- Bulk import customers to Supply'd from a CSV template.
This article will take you through the steps to bulk import customers.
Bulk Import/Add Customers
Supply'd makes it easy to import large numbers of customers from a spreadsheet. There is a specific template you will need to follow to do so in order to allow Supply'd to import the details correctly.
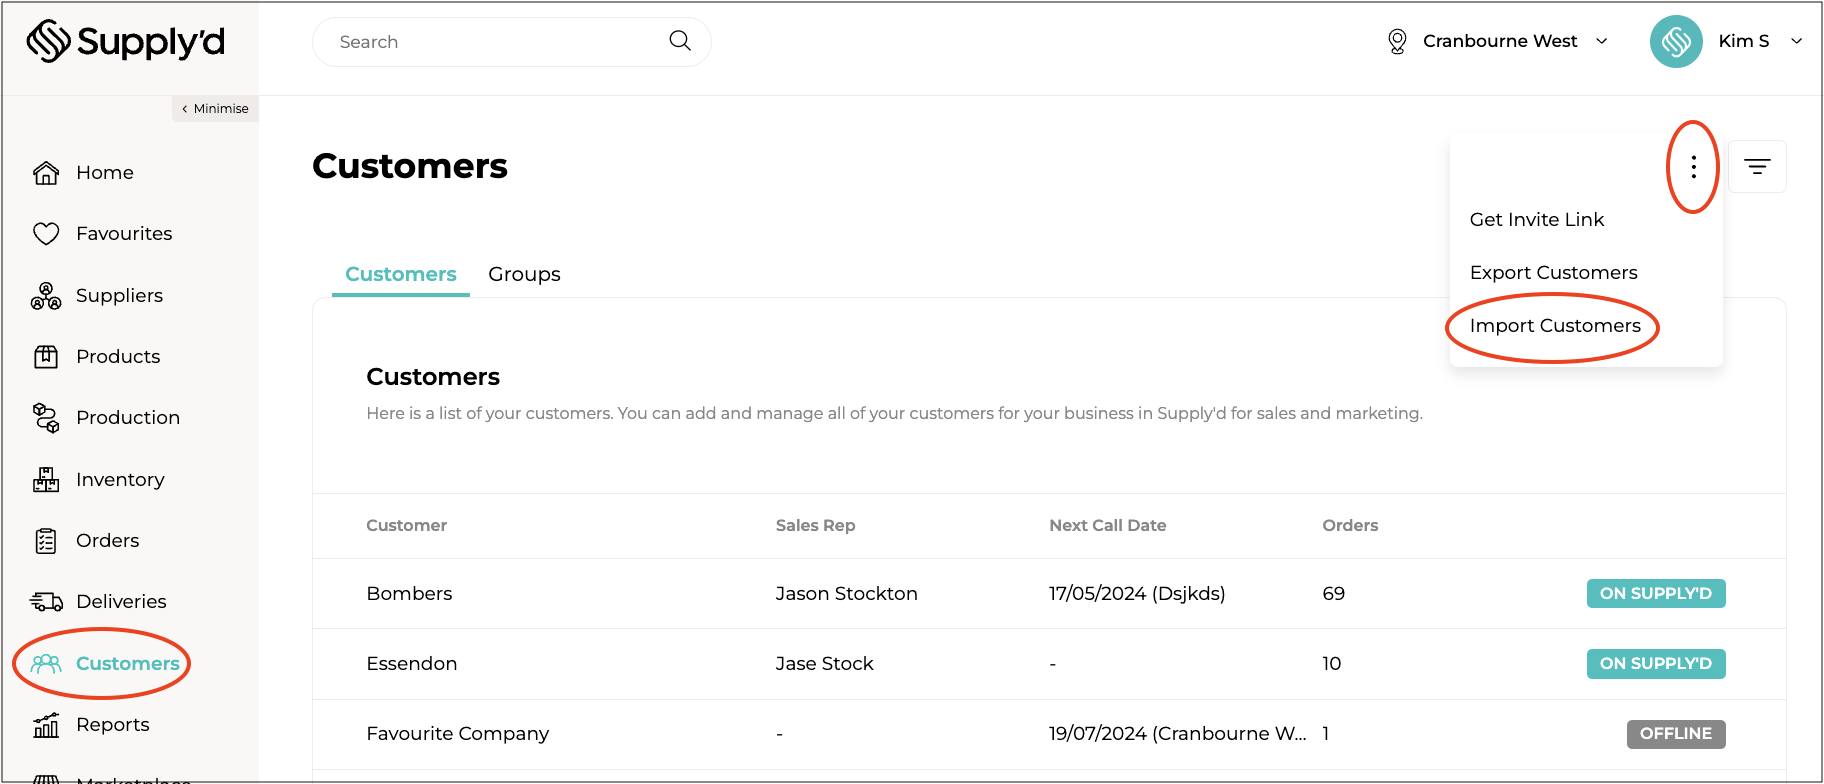
To start and import or to get the template to bulk add customers to Supply'd, select "Customers" from the main menu, then click on the 3 dots in the top right-hand corner, and select "Import Customers" from the menu. The "Import Customers" form will open.
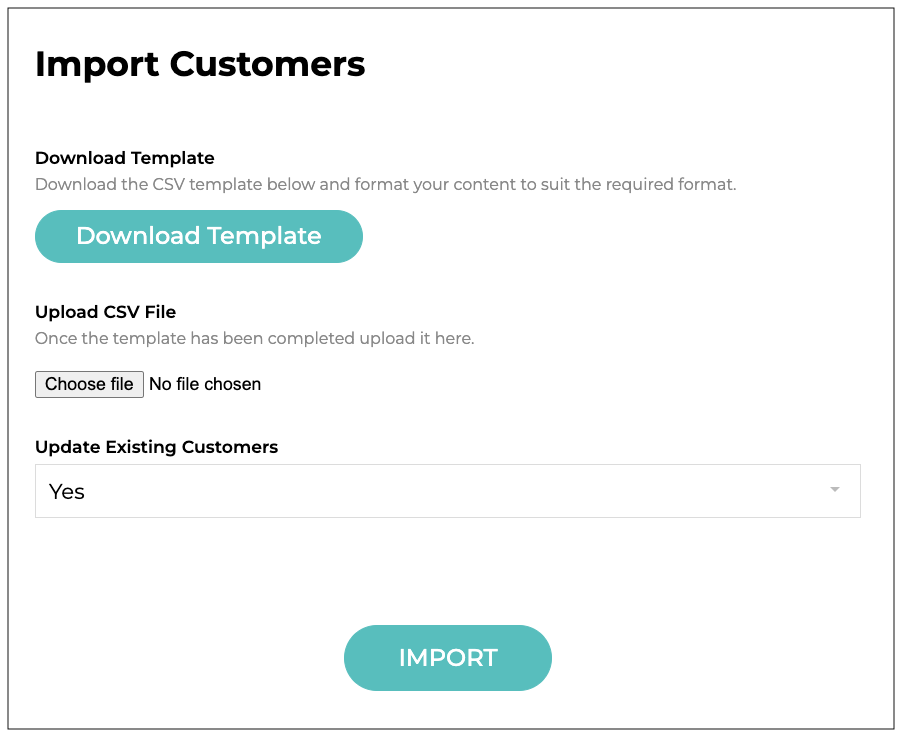
Click on "Download Template" to download our base template containing some sample customers for your guidance. You can open the downloaded template in any spreadsheet application such as Excel or Numbers. You should remove the sample customers from the file before importing to Supply'd.
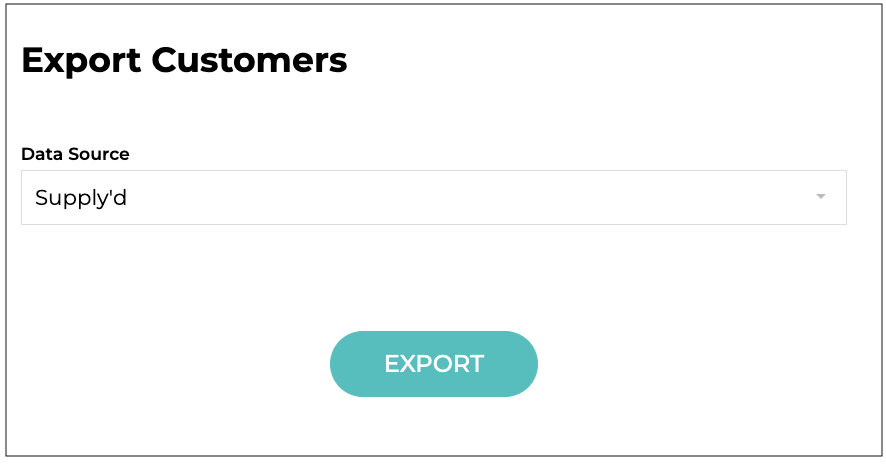
If you have already started adding customers to Supply'd you will also be given the option to "Export Customers", this will export all your existing customers in Supply'd in the template format. This is particularly useful if you want to bulk update the customer list with additional information.
Fill out the template using the guidance below:
- Company Name* [Required] - The trading name of your customer's business.
- First Name - The first name of a representative/contact for the customer's business/company.
- Last Name - The last name/surname of a representative/contact for the customer's business/company.
- Email - A contact email for the customer.
- Mobile Area - The country calling code, eg. +61 for Australia.
- Mobile - A contact mobile phone number for the customer.
- Phone - A contact phone number for the customer, eg. a business landline.
- ABN - The customer's company ABN.
- Website - The customer's company/business website address. If they don't have a website you can use a Facebook or Instagram URL.
- Address - The customer's street address for billing.
- Suburb - The customer's suburb for billing.
- State - The customer's state for billing.
- Postcode - The customer's postcode for billing.
- Payment Terms - Enter the payment terms to apply to this customer's invoices. Leave blank to use the default terms set in your supplier settings.
- Payment Term Period - Specify the term period. This will be "Days" or "Days EOM".
- Account Number - An optional account number for this customer.
- Send Invite - *Field REMOVED* will be ignored.
- Notes - Any notes about this customer. For internal reference only, this is not visible to customers.
- Shipping Zones - Set specific Shipping Zones that are allowed for this customer. Leave blank to not restrict zones. (See the How to Set-up Shipping Zones & Rules article for more information on this). The zone names should be comma separated and match the EXACT name of the zone in Supply'd.
- Groups - Any customer Groups you would like to assign to this customer (see the How to Add Customers and Customer Groups article for more information on Customer Groups). The group names should be comma separated and match the EXACT name of the group in Supply'd.
- Sales Rep - Assign a sales representative to this customer.
Please Note: Make sure the titles are left as is and not edited to prevent issues importing.
To import the file, save/export as a CSV then in Supply'd select "Customers" from the main menu, then click on the 3 dots in the top right-hand corner, and select "Import Customers" from the menu. The "Import Customers" form will open. Upload the file and set whether or not you would like to update existing customers if a match is found and click "Import".
After importing an email will be sent to your email with a report showing how many were successfully added/edited or failed. A CSV will be attached with specific details of which were added/edited or failed and why.
Multiple contacts and location cannot be added against the one customer using the bulk import, these need to be added manually (see the How to Add Customers and Customer Groups article for more information).


