
Products in Supply'd use a "Simple Product" methodology, meaning for each size, colour or flavour of product you would create a new product.
There are 2 ways to import products to Supply'd.
- Manually add products Supply'd.
- Bulk import products to Supply'd from a CSV template (see here.).
Manually Adding Products
Manually adding products to Supply'd is easy, there is a number of options so it can be good to understand what they all are and their purpose.

Add Product
To add a product select "Products" from the main menu. Click the "Add +" button in the top right corner. The "Add Product" form will appear.

Complete the fields as follows:
- Brand [required] - The brand of this product. If there is no brand name you can put your business name instead. Brand is required when selling on Supply'd. Clicking on the field will up a list to select from or you can type your own.
In the example of Sungold Full Cream Milk 2lt, the brand would be "Sungold". When typing in this field it will be suggestive of potential brands we already have in Supply'd, if the brand you're typing isn't in the list you would simply type it in the field without selecting an auto-select option. - Name [required] - The name of the product. As the brand and size can be entered in alternative field you would enter it without the extra details. For example, if you have a Sungold Full Cream Milk 2lt you would simply put the name as "Full Cream Milk".
- Category [required] - Defines the category on your supplier profile that you would like this product to sit under. Supply'd is flexible with categories to allow you to define your own so you can group your products in any way you choose. Clicking on or typing in the field will up a list to select from. For example, with our product Sungold Full Cream Milk 2lt, if you are a milk distributor you may opt to have a "Full Cream Milk" category, or if you sell lots of other products not just milk you may opt to have the category as simply "Milk".
- Size - The weight/size of a single unit. Leave blank to ignore. For example with our product Sungold Full Cream Milk 2lt we would define the size as "2" and select "Litres" on the drop down. This will be displayed elegantly to the customer when purchasing.
- Product Image - Allows you to upload a product image to Supply'd. We recommend a square image at least 640 x 640px with a transparent background as a PNG file. It will also allow JPG files to be uploaded if you you don't have transparent images available.
- SKU [required] - The SKU of the product. This should be a unique identifier for the product. The same SKU cannot be used on multiple products.
- Unit Barcode - The barcode of a single unit this product. This should be the barcode of an individual item in the carton. This allows customer to scan an item to find it quickly in Supply'd for ordering our re-ordering.
- Carton Barcode - The barcode on the carton of this product (if different to the unit barcode or parent carton barcode).
- Description - Allows you to enter a detailed description of the product. This is useful to give customers extra information to assist them with making their purchasing decisions. For example you may include any allergen information and/or ingredients as well as descriptive details of the product.
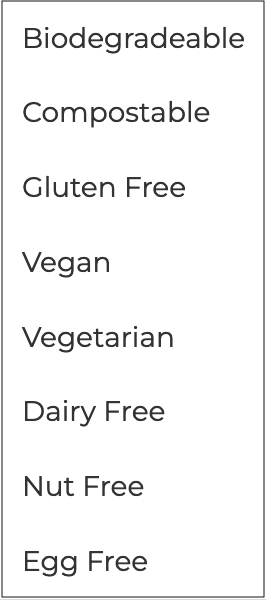
- Tags - Allows you to select a number of tags that suit the product. Tags are predefined by Supply'd and are used to match particular product types. For example, whether the product is vegan, vegetarian, nut free, gluten free etc. Customers can use tags to find, for example, all vegan products that match a given search query. Clicking on the field will bring up a list of possible tags.
- Carton Size (cm) -The width, height and depth of the carton in centimetres when shipped.
- Carton Weight (kg) - The weight of the carton in kilograms when shipped. For our example product Sungold Full Cream Milk 2lt, each bottle weighs 2kg and comes in a crate of 9 so the total weight would be entered as "18". This is used for third party applications such as Shippit in order to provide live quoting on products.
Custom Fields
Define the any custom field data for this product.
Custom fields are extra fields you can create for yourself and may vary from those in our example above. See the How to Manage Product Settings article on how to add these.

Product Type
Define the type of product this is. For example, if it is a standard product, bundled or recipe.

- Product Type* [required] - The type of product this is.
- Standard: The most common product type. It is a single product with no advanced traits.
- Bundled: A bundle of multiple products within one parent product. An additional section, "Bundled Items" will show when this is selected.
- Recipe: A product that is made up of a number ingredients produced at the time of sale, eg. a burger at a restaurant. An additional section, "Recipe Items" will show when this is selected.
- Production: A product that can be used within the production module to be manufactured. When "Production" is selected additional sections will show. For a full description of how to add a Production product see the How to Create a Production Product article.
- Shipping Carton: A shipping carton that can be used at the packing stage.
- Gift Note/Card: A gift note/card that can be configured to automatically generated and printed. An additional section, "Gift Note/Card Settings" will show when this is selected.
- Standard: The most common product type. It is a single product with no advanced traits.

Defines the configuration for this gift note/card. This section will only show if "Gift Note/Card" is selected as the "Product Type".

- Gift Note Template - The size of the gift note to generate. Select the relevant size from the drop-down.
- Font - The font to use on the gift note/card. Select from the drop-down.
- Font Size (mm) - The size of the font to use on the gift note/card.
Food Product Details
Relevant details for food products such as ingredients, nutrition, storage type and more.

- Country of Manufacture - The country the product was made in. Select from the drop-down.
- Ingredients - Any ingredients contained in this product. Leave blank if not applicable.
- Allergens - Contains - Allergens that are present in this product. Enter the allergens only, separated by a comma. (eg. "dairy, nuts".) Don't include leading statements such as "Contains". Leave blank if not applicable.
- Allergens - May Contain - Allergens that may be present in this product. Enter the allergens only, separated by a comma. Don't include leading statements such as "May contain". Leave blank if not applicable.
- Nutrition Information - Click the "Edit" button to enter the nutritional information for this product, if applicable.
- Serving Per Package - The number of servings per package.
- Serving Size - The suggested serving size.
- Per 100g - Enter the nutritional details in these fields. The "Per Serve" values will be automatically calculated.
Click "DONE" to save. The information will now show under "Nutrition Information".
To remove this information, click "Edit",click on the 3 dots on the top right of the "Edit Nutrition" form and select "Remove Nutrition". You will be asked to confirm.
- Storage Type - Select the type of storage required from the drop-down selection. (eg. ambient, refrigerated etc.)
- Shelf Life - Suitable for food products, this field allows you to provide guidance on the shelf life of a product. Enter the number then select "Days", "Months" or "Years" from the drop-down, whichever is applicable.
- Usable Size - The weight/size of a single unit for use in recipes and production. This can be used to specify drained weights or other weights/volumes that vary from the products size. Leave blank to use the product size. Enter the number then select the applicable measurement from the drop-down


Bundled Items
The items and quantities of products to make this recipe. This section will only show if "Bundled" is selected as the "Product Type".

To add items to a bundle, click "Edit Items". You will be prompted to save your product before adding/editing any items. Click "Save & Edit".

The "Edit Bundle Items" page will open.
In our example we are creating a 3-Pack bundle of chocolate unicorns - a white, a pink and a blue.

Clicking on, or typing in, the field that says "Type Product Name" will bring up a list of your products. Here we are adding the white unicorn.

Select the first item used in this bundle. In our example it is a White Chocolate Unicorn. Click "Add".
A simple form will show.


The top field will costing for this bundle. As each item is added this figures will increase to show the total costing.
- Quantity - How many units/cartons of this item will be sold per sale of the bundle. In our case this is one.
- Item cost - The cost of this item.
Repeat the above steps for all items used, clicking "Add" after selecting each one.

Click "SAVE" to add all items.
The items selected will appear on the "Edit Product" page with amounts used and total costing.

3 Dot Menu - Clicking on the 3 dots in the top right of the "Edit Bundle Items" page will bring up a menu.

- Save Items - An alternative to using "SAVE" at the bottom of the page.
- Copy Items From - Selecting this will bring up the "Copy Bundle Items" form. This is useful if your bundle has the same, or very similar items, as an existing bundle.
- Copy From Product* [required] - The product that you would like to copy the production stages from. Clicking on, or typing in, the field will bring up a list of your items. Click "COPY ITEMS" to open up the items in the "Edit Recipe Items" page. Make any adjustments necessary for the current recipe you are creating and click "SAVE".

Recipe Items
The items and quantities of products to make this recipe. This section will only show if "Recipe" is selected as the "Product Type".

To add ingredients to this recipe, click "Edit Items". You will be prompted to save your product before adding/editing any items. Click "Save & Edit". The "Edit Recipe Items" page will open.

Clicking on, or typing in, the field that says "Type Product Name" will bring up a list of your products and ingredients.

Select the first item used in this product. Click "Add".
A form will show.

The top fields will show the recipe size and costing details for the entire recipe and per item produced. As each item is added these figures will increase to show the total sizes and costings.

- Quantity - How much of this item is used in this stage. For example, you use 100g of a 1kg packet of caster sugar in this stage. The Quantity would be 0.1.
- Measurement - How much of this item is used in this stage. For example, you use 100g of caster sugar in this stage.
Tip: You can enter the amount here and the Quantity will automatically calculate for you. - Ingredient Cost - The cost of this ingredient used in this product. This is calculated from data added when setting up this item. This field cannot be edited.
- Cost Per g - The cost of this ingredient per gram. This field cannot be edited.
Repeat the above steps for all items used, clicking "Add" after selecting each one.
Click "SAVE" to add all items.

The items selected will appear on the "Edit Product" page with amounts used and total costings.
3 Dot Menu - Clicking on the 3 dots in the top right of the "Edit Bundle Items" page will bring up a menu.

- Save Items - An alternative to using "SAVE" at the bottom of the page.
- Copy Items From - Selecting this will bring up the "Copy Recipe Items" form. This is useful if your recipe has the same, or very similar, ingredients as an existing item.
- Copy From Product* [required] - The product that you would like to copy the recipe items from. Clicking on, or typing in, the field will bring up a list of your items. Click "COPY ITEMS" to open up the items in the "Edit Recipe Items" page. Make any adjustments necessary for the current recipe you are creating and click "SAVE".
- Copy From Product* [required] - The product that you would like to copy the recipe items from. Clicking on, or typing in, the field will bring up a list of your items. Click "COPY ITEMS" to open up the items in the "Edit Recipe Items" page. Make any adjustments necessary for the current recipe you are creating and click "SAVE".

Buy Product
Toggle on if you buy this product from a supplier.

Clicking on, or typing in, the field that says "Type Supplier Name" will bring up a list of your suppliers. Click "Add". A form will show.

- Purchase By* [required] -Whether you buy this item by the unit or as a carton. Select either "Unit" or "Carton" from the drop-down.
- Purchase Carton Quantity* [required] - How many units in a carton when purchasing. This field will only show when "Carton" is selected in the "Purchase By" field.
- Buy Price (ex Tax)* [required] - The wholesale price for a unit or carton, excluding GST, depending on your choice in the "Purchase By" field.
- Buy Tax* [required] - Whether or not GST applies to this product when purchasing. Select either "GST" or "GST Free" from the drop-down.
- Supplier's SKU - The SKU or unique identifier for this product to be used when sending orders to the supplier. Leave blank to use the overall product
- Supplier's Barcode - The suppler's barcode for this product used for receiving stock with this barcode. Leave blank to use the overall product barcode.
- Supplier's Brand - The brand of the product being bought. Leave blank if the same brand as the product. This is useful if you have the same product where you buy different brands from different suppliers.
- Supplier's Size - The weight/size of a single unit. Leave blank to ignore if the same size as the product.
If this product is purchased from more than one supplier, additional suppliers can be added by repeating the steps above.
Sell Product
Toggle on if you sell this product.

- Price (inc tax)* [required] - The default sale price for a carton/unit of this product. This is used in place of each sales channels price if they are left blank.
- Sale Price (inc tax) - If this product is on sale, enter the sale price here. Leave blank for no sale price.
- Tax* [required] - Select whether or not GST is applicable to this product when selling. Select "GST" or "GST Free" from the drop-down.
- Pack In Carton - Whether or not this item should be packed in a shipping carton when shipped. Select "Yes" or "No" from the drop-down. If "Yes" the item would be packed in an aggregated shipping carton during packing. If "No", the item would ship as is with no additional cartons.
if you want to sell this product on Supply'd.

- Supply'd Price (ex tax) - The price for a carton/unit on supply'd, excluding GST.
- Supply'd Sale Price (ex tax) - If this product is on sale on Supply'd, enter the sale price here, excluding GST. Leave blank if the product is not on sale.
- Tax* [required] - Select whether or not GST applies to this product when selling on Supply'd.
- Pack In Carton - Whether or not this item should be packed in a shipping carton when sold on Supply'd.
- Default: The would be packed as per the setting set under "Sell Product" for this product.
- Yes: The item would be packed in an aggregated shipping carton during packing.
- No: The item would ship as is with not additional cartons.
- Unit RRP (inc tax) - The recommended retail price for a stockist to sell a unit of this product at, inclusive of GST. For example, Sungold Full Cream Milk 2lt retails for $3.50 per bottle so we would simply enter the value as "$3.50". This is used to give guidance to the customer on what to charge for the product, as well as allowing margin calculations for the customer.
- Sold on Supply'd As* [required] - Whether you store/sell this product by the unit or as a carton on Supply'd. Select "Unit" or "Carton" from the drop-down.
- Carton QTY* [required] - How many units in a carton when selling on Supply'd. This field is only visible when "Carton" is selected in "Sold On Supply'd As".
- Visibility* [required] - Whether or not the product is available in the marketplace.
- In Marketplace - The product will be visible to customers in the marketplace that match a business type in the "Sell To Categories" list. ?????
- Out of Stock - The product is visible in the marketplace, but marked as out of stock and cannot be ordered.
- Not Visible - The product will not be visible to customers in the marketplace. It can only be used when manually creating a sales order.
- Specific Customers - The product will only be visible to the specified customers in the "Assign To Customer" list.
- In Marketplace - The product will be visible to customers in the marketplace that match a business type in the "Sell To Categories" list. ?????
- Assign to Customer - Specify any customers who can see and buy this product. Only customers that you select can order this product. The customer must have already be your customer or have been invited to Supply'd. To find out more about adding a customer click here. This field is only visible when "Specific Customers" is selected in "Visibility" field.
- Requires Liquor Licence - Select "Yes" or "No" from the drop-down. If "Yes" the customer will be required to provide their liquor licence.
- Restrict By Shipping Zones - If this product is only available in certain shipping zones, you can select the available zones here. Leave blank for availability in all zones. Clicking on, or typing in, the field will bring up a list of your Shipping Zones.
Sell on Shopify - Shopify Store?
Toggle on if you would like to sync this product to your Shopify online store. Additional fields will show when this is toggled on.

- Shopify Store Price (inc Tax) - If you would like to set a different for your Shopify Store to the product price you can override it here. This price will sync to the Shopify Store only. Leave blank if the Shopify price is the same as the product price from above.
- Shopify Store Sale Price (inc tax) - If your product is on sale, you can enter the Shopify Store sale price here. This price will sync to the Shopify Store only. Leave blank if the product is not on sale or Shopify sale price is the same as the sale price from above.
- Shopify Store Tax - If you would like to set a different tax for your Shopify Store to the product tax you can override it here. This tax will sync with Shopify Store only.
- Pack In Carton - Whether or not this item should be packed in a shipping carton when sold on Shopify Store. Select from the drop-down.
- Default: The item would be packed as per the setting set under "Sell Product" for this product.
- Yes: The item would be packed in an aggregated shipping carton during packing.
- No: The item would ship as is with no additional cartons.
- Collections - The Collections you would like to feature this product under in your Shopify Store.
- Sales Channels - The sales channels you would like this product assigned to in Shopify Store. Leave blank to use the default setting from your Shopify Store integration settings.
- Track Inventory - Whether or not to track inventory on this item in Shopify Store. Select "Yes" or "No" from the drop-down.
- Stock Buffer - Set a buffer for this products inventory sent to Shopify. A buffer will reduce the quantity of each products inventory by the buffer amount to help prevent overselling. Leave blank to use the default set in your integration settings.
Toggle on if you would like to sync this product to Square.

- Square Price (inc Tax) - If you would like to set a different for Square to the product price you can override it here. This price will sync to Square only. Leave blank if the Square price is the same as the product price from above.
- Square Sale Price (inc tax) - If your product is on sale, you can enter the Square sale price here. This price will sync to Square only. Leave blank if the product is not on sale or if the Square price is the same as the sale price from above.
- Square Tax - If you would like to set a different tax for Square to the product tax you can override it here. This tax will sync with Square only. Select "Same As Product" to use the default setting for the product, "GST" or "GST Free" from the drop-down.
- Pack In Carton - Whether or not this item should be packed in a shipping carton when sold on Square. Select from the drop-down.
- Default: The item would be packed as per the setting set under "Sell Product" for this product.
- Yes: The item would be packed in an aggregated shipping carton during packing.
- No: The item would ship as is with no additional cartons.
- Square Product Name - If you would like to override the default product name synced to Square, you can enter a new name here. Leave blank to sync to the default configured name.
- Sales Unit - How is this item sold. Default is by item, however, if the item is sold by weight or length you can set the appropriate option here. Select from the drop-down.
- Track Inventory - Select "Yes" or "No" from the drop-down whether or not to you would like to track inventory on this item in Square.
Advanced
Advanced Settings for this product.

- Version Of - The product ID of the product that this item is a version of. This is used to tie a product you buy from a supplier on Supply'd with the same product you have in your products. Providing this allows this product to be matched when receiving the related item.
- Enable Picking - Whether or not this item should appear in pick lists. If "No" the item will only show at the packing stage.
- Collate Picking - Whether or not to collate this item in picking when multiple are ordered. This is useful for instances where additional meta data may be present for imported orders.
Notes
Add any desired notes about this product, for internal reference only.

Save
Click "SAVE" to finish creating the product.

"Save Product" is also an option on the top of the form when clicking the three dots on the top right corner.

Editing Products
If you would like to edit a product, simply select "Products" from the main menu. Click on the product you want to edit. Click on the three dots on the top right corner and select "Edit Product". Change any fields as required following the steps above.

Removing Products
If you would like to remove a product, simply select "Products" from the main menu. Click on the product you want to remove. Click on the three dots on the top right corner and select "Remove Product".

You will be asked to confirm.